The Lagun mount is a popular retrofit for the dining table in the Alto. Safari Condo uses the mount in one of their models, and also offers a kit to help owners perform their own installation.
 |
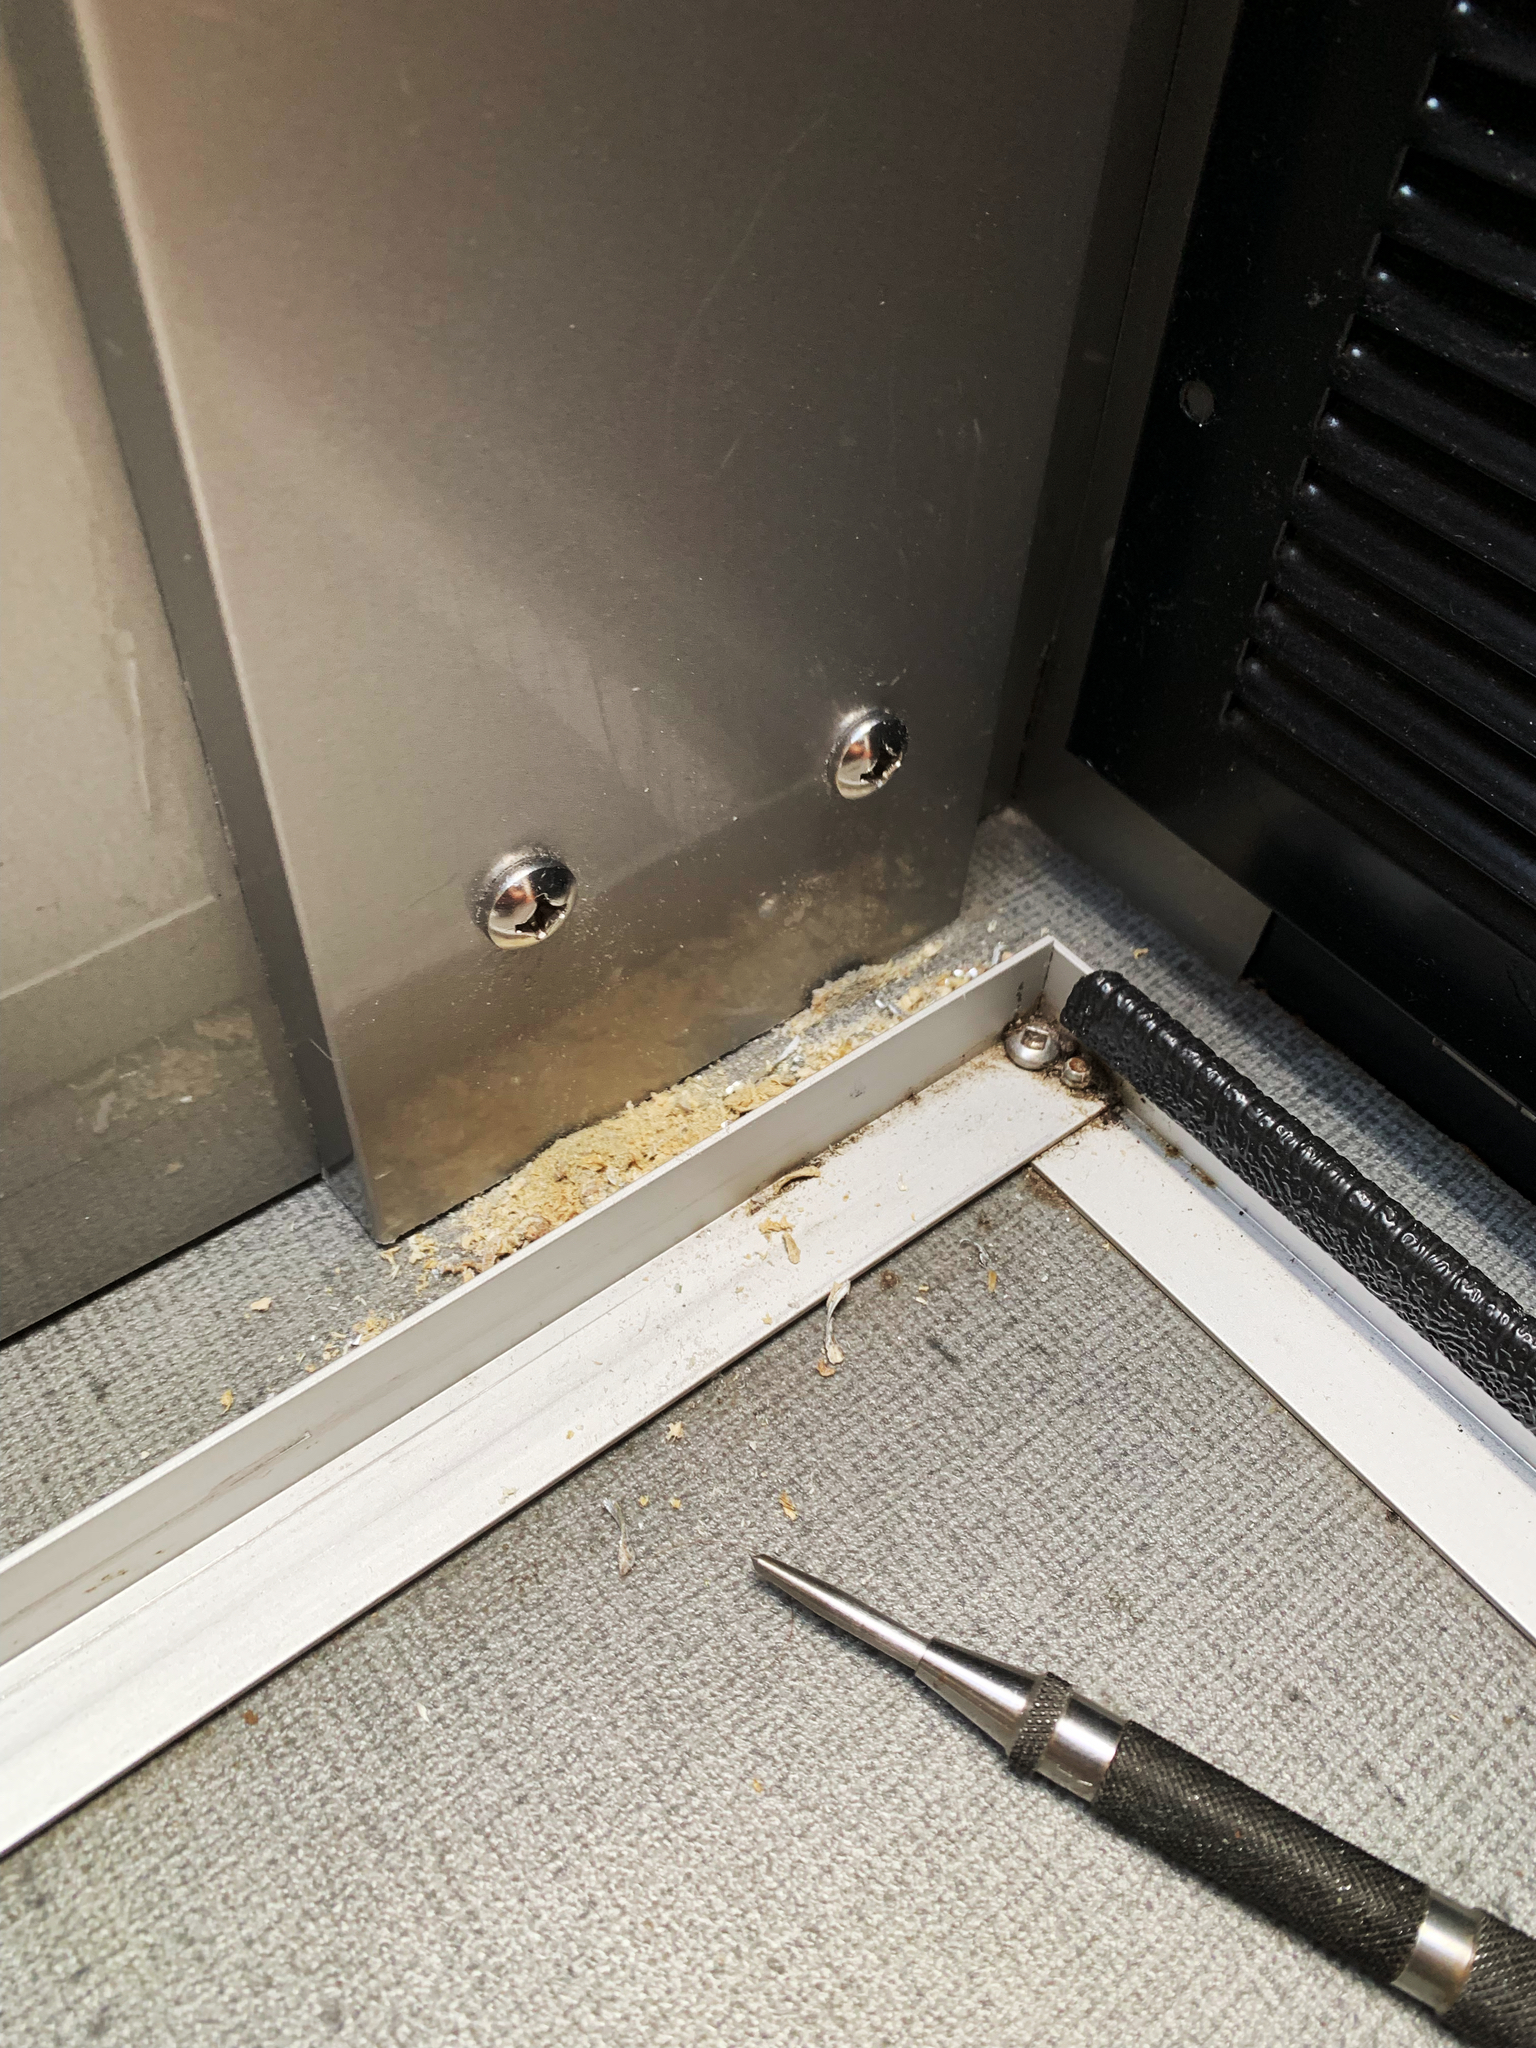
| notice the suspect screws, and also the nicely covered plywood |
Chris and Jen wanted this mod for their 1743, and picked up the kit on a recent service trip to the factory. After examining the kit, Chris had a few thoughts, so we got together for yet another caffeine fuelled mod discussion.
We soon determined that SC had put together a good kit, but that a few changes to the installation process would provide a more solid attachment to the mounting surface. We got the feeling that one goal of the SC kit design was to make the work for an SC service tech as efficient as possible.
The following steps we outline are only intended to be used in conjunction with the Safari Condo kit.
The SC kit consists of all the parts included by Lagun, including a couple of nylon shims and their own pre-drilled plywood support. This particular piece is replaced by the SC custom fitted plywood support. The SC piece is sized to fit exactly between the lip of the front bench frame and the floor. It comes with a nicely formed cover made of the same material as the Alto. This gives it a very factory look and feel. Also included are the mounting screws and installation instructions.
In our view, the weakest part of the SC kit was their use of sheet metal screws to secure the Lagun mount plate. The larger screws go through the plate and into the square aluminum tubing that frames the electrical cubby. These would be absorbing the majority of the lateral stresses from supporting the moveable arm and the table weight. We decided bolts would serve better here. The two lower holes in the plate had smaller screws supplied, and these would only be driven into the 1/2 inch aluminum covered plywood provided by SC with the kit. These were changed to bolts as well. To speed the install a bit, the smaller screws could be used in the lower mount holes, as there is not the same pressures exerted here as on the upper holes. There were no screws or bolts specified to fasten the SC supplied plywood at the bottom, but we added bolts, through another block of wood on the reverse side of the wall for additional stability. All the new bolts are appropriately sized stainless steel, with washers and nyloc nuts.
One aspect of the the install that is perhaps overlooked, is the need to compensate for the small amount of weight sag that will occur when everything is assembled and tightened down. There are swivel posts in the Lagun arm, and once weight is applied, any small allowances will disappear, and the table will sag. Installing the mount plate with a little opposite lean will compensate for the natural sag, and you will have a visually level looking table. It’s all about the details!
We positioned and clamped the aluminum wrapped plywood and Lagun mounting plate in place, and drilled only one of the top mounting holes. The hole was drilled entirely through the square aluminum tubing, and the new mounting bolt was tightened down.
 |
| far more secure than the intended screws |
Turning our attention to the table top, and contrary to the supplied instructions, we carefully removed the existing mount, which was held in place by screws and some silicone. We then determined the best location for the mount to be installed on the underside of the table, by installing the arm and visually assessing the positioning. Again, contrary to the instructions, we installed the under table mount lengthwise, deciding this orientation would provide a bit better support. Screws from the existing under table mount, and a bit of silicone, will hold the new mount firmly in place.
 |
| not going anywhere... |
Once the mount was on the table, we attached the table to the arm, and the arm to the Lagun mount. Then the natural sag came into play, and we determined the amount of opposite lean to apply to get back to level, then drilled one of the lower mounting plate holes.
 |
| a bit of clamp wrangling to hold it in place for a moment |
 |
| the amount of opposite lean that was needed |
Both bolts were then snugged up, and the two remaining holes were drilled and bolted. The new lower holes were drilled, with the bolts running through a simple wood backing block.
 |
| the aluminum covered plywood gave it a factory look |
 |
| the end result...a level table |
This completed the install. We liked the kit, but definitely feel that our changes have improved an already nicely provisioned kit, and has resulted in a very solid mount.

Excellent install. SC should add your mods
ReplyDeleteThe version of the kit I received from Safari Condo has 4 sets of nuts, bolts and washers but no screws. So maybe they've changed their procedure to something more like this.
ReplyDeleteThat's interesting. We certainly did not like the idea of using screws, given the stress those two top ones would endure. Perhaps they had issues with some installs. Thanks for the update.
DeleteDid you use the original table top, modify it or make/get a different table top?
ReplyDeleteThe original top was used.
DeleteJim, nice writeup. I ordered and received the "Table Leg System Lagun" and on the same SC order page was the "Fixing Plate for Alto". I am thinking this plate is the one you describe that is plywood covered by the same material as the Alto. Just want to make sure I have your install correct. Did you use anything on the back side for support? In other words did you put some type of wood backer inside the electrical cubby area? My kit came with 4 bolts, nuts, and washers
ReplyDeleteJim, I recently ordered the "Table Leg System for Lagun" along with the "Fixing Plate for Alto: and got the same parts as you except 4 bolts/nuts/washers were included instead of screws. It appears you use the wood with 4 holes on the electrical cubby area, correct? Did you have to modify the tray table in the cubby area to fit around the backing plate (same piece of wood with the 4 holes). I thought about using a piece of wood in the cubby area that fits from the floor to the bench area providing a place to put the 4 bolts that hold the mount through as well as the two bolts you put in at the bottom of the fixing plate
ReplyDeleteSeems they have replaced the screws with nuts and bolts. The top bolts go through the mounting plate and the bench frame. Can't recall if we used the four hole backing wood as we also put bolts through the bottom frame. I think some altering of the shelf was needed.
Delete