2016 Trip 12: down to the last out...

Trip 12: Cedar Cove - Oct 2016

We headed to Cedar Cove this afternoon, our traditional spot to winterize the Alto and close out the camping season. Cedar Cove is a nice private campground, that is quite close to Ottawa. Although it is mostly a seasonal campground, the overnight sites are close to the water, fully serviced, and they also have a good restaurant. This gives you some options if you just don't feel like cranking up the Q and getting a dinner together. The weather was co-operating, a bit of a drizzle on Friday evening, but on the whole, pretty good. There was a large trailer on a site across from us, and the couple were lounging outside listening to the Jays game. He gave me a quick update on the game thus far, and I listened as we set up. There is something quite special about a ball game on the radio. It is always a pleasure to follow a baseball game over the radio, better than other sports. I think it has to do with the pace of the game, the strategy, the stats, the announcers...this all seems to lend to the feeling that you could actually be at the game, instead listening over the airwaves. Fellow Alto owners, Chris & Jennifer also arrived Friday with their 1743, and once we were all set up, we got together for a beverage and quick catch-up. This was their first season, and they are closing up this weekend as well.

It was nice having electricity, as the temperatures dropped into the low 30'sF overnight, so our various sources of heat got a good workout. Actually, this is only the second time we have electrics this season, the first being when we opened up back in May, at this very site. Our reliance on serviced sites has dropped way off over the years, as we slowly settled into our style of camping. As well, our trend to favour waterfront sites usually negates any chance of services. Interesting how things evolve, our camping style shaped by the experiences we most want to enjoy.

Coffee on the Coleman in the morning was definitely a brisk wake-up event. Even still, it is a great way to start the day, as usually you are out there alone, surveying and taking in all around you. There were others awake at this time, it is hunting season, and the faraway sounds of shotguns occasionally broke the morning quiet. Dale and Barley were still well tucked in under the covers when the coffee made its way back into the camper. It was a very relaxing day, a nice power walk, poked around the Alto, read a bit, grabbed a quick nap.  I also made a few notes on potential winter projects for the Alto, something I seem to do every closing weekend. Later in the afternoon we walked over to Chris & Jenn's for a pre dinner beverage and appies.

2016 Trip 11: boys weekend

Trip 11: Bonnechere P.P. - Sept 2016

Headed out at noon, wanting to get a bit of a head start on my "boys weekend". Now before your mind conjures up images of beer cans, hot dogs and bonfires, it will be pretty tame as there are only two of us, and for the record, the other guy has four legs! Yup, Barley and I are spending some quality time together this weekend.


2016 Trip 10: a simple relaxing weekend

Sharbot Lake P.P. - Sept 2016

Back to Sharbot Lake, on the primo site we had last time we were here. Only goes to prove that a little planning can sure help in snagging a great site. Now that September is upon us, the finality of our short camping season has descended upon us. Knowing that this is one of the last times out, our trips become less of an adventure, and more of just getting out there...to soak up the last of the fresh air and natural surroundings.


looking for a little breeze...

So it is a Sunday afternoon and I have just finished a little outside repair on the house. I've got an assortment of tools in my bucket, including my drill and bits, so naturally, I'm wondering if there is anything else that needs to be done...and naturally, my gaze fell upon the Alto.

We were sitting at Sandbanks this summer, soaking up a beautiful, although stinking hot day, when it struck me that there was really not a lot of natural air circulation in our Alto. This can be helped by running the fan, but glancing around at the screened openings, it is pretty limited. This is certainly the case when compared to the 1743 model, which has very large opening on all sides, so the breezes must be wonderful. Our particular vintage also has the original metal back window, that incorporates a narrow screened band at the bottom, rather than the newer plastic window that can be opened to expose a large ventilation area.

While I was sitting at the front table, sweating, I started to look closely at the screened part of the door, wondering how to increase that surface area. As we have Barley with us, we still need the option to make sure he stays indoors, which means the door must be closed. This sort of precludes the full screen door mods that are out there, as I know Barley could blow right through those if his desire was strong enough.  At times we have been putting him on his leash and opening the door, but as a rule, it is usually closed. Not many options to do anything that would yield a big improvement, but I did notice a possibility for a minor change.

Our window slides open and is held in place by a plastic clip, which is attached to an aluminum cross bar. There did not seem to be any reason why the window would not slide open a little higher, based on the frame design. The limiting factor is when the frame starts to curve at the top. The cross bar is held in place by two small rivets, which are easily drilled out. I also pondered whether this cross bar contributed to the structural integrity of the window itself, and I came to the conclusion that it did not. There is a joint to the track part of the window frame, slightly below the cross bar, but it has its own linking plate. 


note the position of the cross bar and the amount of glass covering the screen
As this bar will be moving up into the area where the window frame starts to curve around the top, this means that the bar itself needs to be modified. Doing this then negates any possibility of reversing the mod, should it not work, or worse yet, if I screw up the measurements. Given the vintage of the window, and that they are no longer even made like this, if I did screw up, I strongly suspect there would no way that SC could bail you out with a new piece. One must remember this before starting a mod. Always have a Plan B in mind to fix a mod that might not work, or goes horribly off the rails.

I carefully drilled the rivets, and off came the bar.  The window was raised to almost its maximum height, and the bar was marked for its new location on the frame. A small piece was cut off each end to fit the curve of the frame, then new holes drilled for the rivets. A quick install of the rivets, and we were good to go. I applied a bit of black paint here and there, and other than the old rivet holes that are now visible, it certainly looks like this is the way it came out of the factory.


2016 Trip 9: Rollins...always great!

Rollins Pond S.P. - Aug 2016

Off to Rollins for a week vacation, the second part of splitting our two weeks of vacation this summer. We tried something a little different on this Rollins trip, as we usually head down Friday morning, and use it as our travel day. Throw in the stops we make for a little shopping in Ogdensburg and then groceries in Tupper Lake, and the Friday is pretty much shot by the time we make it to the park. Dale dropped an idea a few days before we left about heading down earlier after work on Thursday instead, and here comes the change, stay overnight in the Ogdensburg Walmart parking lot. That is generally our first stop anyways, so why not camp there? Shop in the evening, then hit the road in the morning?  It made perfect sense, so that's exactly what we did.

one could almost call this quaint...

Solar Upgrade Part 3: a 12 volt audit

When one gets a new gizmo, there is a strong tendency to gravitate towards using it all the time...it's only natural. I would have to say that the Trimetric has had a bit of this effect on me...I just have to press that little button to open up the new world of information it has to offer. This is not a bad thing mind you, I have a much better understanding of what is going on with the state of our solar/battery setup than I ever did before.

Once I got past the fascination with the raw data, it was time to put it to use to figure out exactly what each 12 volt device in the Alto costs, in terms of impact to the battery. Energy conservation while off grid is a bit of a pursuit of ours, so knowing what the real loads are will be great. So I began an energy audit, and along the way, learned a little bit more about how some devices actually work.

First I put together a list of the devices that run on 12 volts, or have a 12 volt component in their operation, such as the 2-way fridge. It may be propane and electric, but the overall operation is controlled by a 12 volt circuit board. Same goes for the water heater. There are a surprising number on board, 19 unique devices in our Alto, not double counting any of the similar light fixtures.  Once I had the list, I then set about to determine the amp hour draw of each one.  This involved turning devices on one at a time, and recording the draw as measured by the Trimetric.

With the display off, the draw of the Trimetric is .01 amp/hr. This came right from the spec sheet, as with no display, how would you get this info? With the display on, the draw is .03 amp/hr. This became the phantom draw to be removed from each reading taken. Next up were the detectors, of which our Alto has the two separate units, LP & CO. As they are both on the same circuit, it was easy to find the combined draw. I might add that all this detective work was done well after darkness had fallen. I wanted to completely eliminate any residual power generation from the solar panels.  The amp/hr calculations done by the Trimetric are based on what is going in & out of the battery. If there is a bit of solar amps going in, then the reading of a device’s draw will be skewed by this positive value. This also fluctuates, as the Trimetric is sensitive enough to pick up the solar output changes caused by even a tiny little cloud.  After dark, I know the readings are truly for the device draw, with no other influences.

From there, it was just a matter of putting the various devices into use one at a time, and watching the Trimetric calculate the negative impact on the battery. Pretty straight forward stuff, or so I thought. I had assumed that once the detectors were on, that was the draw. Not so. While I was finding the draw for one of the LED lights, I saw the amp display move from a stable value, and jump up a fair bit.  There was nothing else on, other than the detectors, so it was a tad puzzling. A bit later, the draw dropped back down to what it was when the light went on.  I turned the light on and off, and monitored the draw further...sure enough, up it jumped again. I timed the on/off cycles. It was soon clear that one of the detectors was "sniffing" the air on a regular 1 minute on, 1 minute off cycle. Based on this, the phantom draw of the detectors was certainly more than I first recorded, and you would be surprised how this changes the calculations over a 24 hour period. The fridge has a cycle as well. There is the control board, and then when the fridge is called upon to cool, there is a little solenoid that opens to allow the propane to flow for the cycle. Holding that solenoid opens makes up the bulk of the draw, and needs to be factored into the amp/hr cost.

Once everything was mapped, I created a little spreadsheet (of course) that would calculate the draw of each device, over different periods of time. Anything with a phantom draw as well as a functioning draw is calculated over a 24  hour period, and this required some adjustments to blend the amp/hr rate. Yes...this is all very geeky.

The chart is pretty interesting, especially when you start to play with the amount of time that a device is running in a day. Take the water pump, a huge amp hog, but then look at how long it actually runs in a day. Even including the possibility of a Dale outdoor shower, would that pump run 10 minutes, 15 perhaps, in a day. This works out to about 1 amp/hr a day. Now look at those little detectors, no motor in them, yet over the 24 hours they are on, they eat over 3 amp/hrs! Now who is the power hog??? But that's not to say those are not worthwhile amps, and certainly not going to try to save any there.

When trying to figure out just how many amps were being used in a day, I think there are a couple of groups, what I call the driveway and camping core draws. These are consumptions that are just simply going to be there, regardless. The driveway consists of the Trimetric and the detectors, and over a 24 hour period, adds up to over 3 amp/hrs. I've heard some people pull the fuse on their detectors at times, but I'm just not comfortable with that, even if it is just simply sitting there, waiting for the next adventure.  The core camping draw are the same devices, but adds in the fridge and water pump. If you are out, you are pretty much using these, and they are pulling amps out of the battery. I'm sure you could find some savings if you are able to adjust the temp of the fridge, or even turn it off, but for the sake of not getting too crazy with the calculations, I'm assuming a relatively normal manner of operations.

From there, I used this core group and came up with a couple of scenarios, to try and estimate just how much we may be using. These definitely lean towards conservative consumption. You can see how it could be very easy to use up all your available amp hours, as devices go on, it add up quickly. If you are out for a while off grid, you also have to keep in mind that you need to replace the amps you take out, and this requires good solar conditions...which means lots of sunlight. As well, from what I have read, the amp hours come out of a battery a lot easier than they get replaced, which is probably the main reason I upgraded the solar controller, to make sure this process was as effective as it could be.

So after a few outings with the new solar components, am I satisfied it has been a good investment? Most definitely! Not only do I know exactly what is coming and going from the battery, I know that the battery is being charged as effectively as possible. Can I quantify this. I think so. The battery recovers its charge a little faster, from the parameters programmed in it is certainly fully charged, and when I initiate an equalization phase, I know I am prolonging the overall battery life as per Trojan specs. Sounds pretty good to me.

I would certainly recommend the additional of a Trimetric monitor for those planning on a lot of off grid camping. It really helps you know exactly what the battery state of charge is.

Have a look over the chart, and although some of the equipment in the Alto has changed over the years, it will give you a high level picture of how amp hour usage can accumulate over the course of a day, and how your own camping style will impact this.  The raw numbers are there to help you calculate your own scenarios. Pretty interesting stuff.


Item Device Phantom
Draw
Amp
Draw
Approx
Mins
Day
Approx
Hrs
Day
Daily
A/hrs
Notes
1Trimetric
(display off)
0.0100.010144024.000.240
2Trimetric
(display on)
0.030300.500.015
3LP/CO detectors
(individual units,
same circuit)
0.09
(0.18 sniffing)
0.135144024.003.240- one detector sniffs for
1 minute,
then phantom for
1 minute
- amps prorated
over 24 hrs
4Fridge
(Dometic
2-way propane)
0.07
(0.32 cooling)
0.284144024.006.816- estimates fridge cools approx. 40 min/hr
 -amps prorated
over 24hrs
5Fridge Vent Fan
(single 50CFM fan)
0.1703005.000.850- only used during
hot weather
6Water Heater
(Suburban propane)
0.750300.500.375- morning/evening
cycles
7Furnace
(Propex propane)
2.1701803.006.510- morning/evening
occasional cycles
8Water Pump5.630100.170.938
9Roof fan
(setting 1)
0.9601803.002.880
10Roof fan
(setting 2)
1.4901202.002.980
11Roof fan
(setting 3)
2.240000- rarely used
12Roof lifts6.03010.020.101
13Bench lift1.16010.020.019
14Light fixture
(single LED
tube retrofit)
0.420601.000.420- Luci lights factor
into all lighting estimations
15Light fixture
(double LED
tube retrofit)
0.910- rarely used
16LED strip
(front cabinet,
dimmer low)
0.030601.000.030
17LED strip
(front cabinet, dimmer high)
0.270
18LED strip
(sink)
0.150300.500.075
19LED strip
(ceiling ambient)
0.220601.000.220
20Exterior light
(incandescent)
0.930- rarely used
21TV
(tv mode)
0.050
22TV
(dvd mode)
0.0501.7501202.003.50
23Tank monitor0.13020.030.004
24Fantastic fan
(portable,
setting 1)
1.3301803.003.990
25Fantastic fan
(portable,
setting 2)
1.980
26Fantastic fan
(portable,
setting 3)
2.760
27Tivoli
(radio charging)

28Core draw
(driveway)
0.145144024.003.480- items: 1, 3
- amps prorated
over 24hrs
29Core draw
(camping)
0.429144024.0011.234- items: 1, 3, 4, 8
- amps prorated
over 24hrs
30Cool day scenario18.644- items: 6, 7, 14,
16, 18, 29
31Hot day scenario22.834- items: 5, 6, 9, 10,
14, 16, 18, 24,
25, 29
32Conserving day scenario 14.114- items: 9, 29

2016 Trip 8: The Hip...Canada's band

Sharbot Lake PP - Aug 2016

Let's just start by saying that our little blurb about camping this weekend pales in comparison to what happened Saturday evening in Kingston...the end of The Tragically Hip's tour, and the last concert they will ever play.  An emotional tour for both the band and its fans, who were stunned by the announcement  in May that Gord Downie has terminal brain cancer. A poignant end to a 30 year musical journey that over the years created a soundtrack of Canadiana. It was an amazing and emotionally charged evening, the entire country watching, enjoying, and saying thanks for being Canada's band for so many years.

Headed out after work, the traffic is surprisingly light for a summer Friday evening. Made great time to the Park, got registered and then made our way to the site. We were able to reserve what may be the nicest waterfront site in the Park. It is a good size, level, and with lots of privacy. Well tucked in from the road, and although a bit of a challenge with a sharp downward turn from the road, once again, going slow and taking your time proves we can place the Alto pretty much anywhere.


2016 Trip 7: a beach bum vacation

Sandbanks PP - Aug 2016

Friday
Headed down to Sandbanks this morning to start one week of vacation. One of our favourite locations, Sandbanks is apparently the largest freshwater sandbar and dunes in the world!  The hot weather has continued in Ottawa, so we figure Lake Ontario should be nice and warm for swimming.


2016 Trip 6: the weekend was just ducky...

Bonnechere PP - July 2016

Friday
It has been stinking hot all week, seriously hot. The sun starts to cook you if you are out in it too long. The humidity is adding a whole other level of uncomfortable to the equation and throw in the occasional thunderstorm, it made for quite a week.  All this made us really look forward to getting out of Dodge for the weekend.

Picked Dale up at work at 5:00, and we were on the road. Still hot and humid today, but the heavy overcast and passing rains have kept the temps just a tad lower than the past week. A dandy cloudburst rolled through just as I was about to pull out, so Barley and I just chilled until it passed. Slow going on the road, and we drove in and out of pockets of showers the whole trip.

Fair amount of traffic, and as usual, when there is a line of traffic, even though it is moving along quite nicely, there will always be the clowns that absolutely need to get by everyone. We had two notables this drive. One moron passed a couple of cars at the very end of a passing lane, on the right hand side! He ran out of lane, and completed his maneuvre using the shoulder, forcing the rest of us to brake to give him room to get in. The second clown was a Harley rider, who blew by me at reckless speed, and had just enough room to squeeze in ahead of me, narrowly avoiding becoming a messy hood ornament. Those bikes can scare the hell out of you, that loud two cylinder rumble is assaulting your eardrums before you even know it. His bobbing and weaving must have caused his sunglasses to catch some air, as the next thing you know, a pair of bright orange rimmed sunglasses are airborne, and in a moment of beautiful karma, are now directly in my path. Not saying I aimed for them, but also not saying I tried to avoid them. What goes around, comes around.

Fortunately the rain abated to a light drizzle by the time we arrived at the campground, and we were soon backed into what might well be the best spot on the river loop. Same as last year, this site is simply awesome.


2016 Trip 5: sun, sand & fireworks!

Driftwood PP - July 2016

Wednesday:
Canada Day long weekend, and actually, an extra long weekend when you add a day on. Friday is the holiday, so we added on the Thursday and headed out Wednesday night.

The Wednesday leaving almost did not happen. We made the booking many months ago, as is required to get a waterfront site at this campground, we knew we were adding a day, but it was not until just last week when I was reviewing our summer bookings, that I noticed I had not booked the Wed evening. Driftwood is within the range of what we call our normal weekend circle of travel so there was no reason why the evening would not have been booked...but understandably forgotten, given that these reservations are made at 7:00am in the morning in the dead of winter. So in a fit of panic, I immediately logged into the Parks reservation site to see what was available for the Wed evening. Lo and behold, the site we had booked for the weekend was available, so I snapped it up right away. Talk about bullshit luck. This year has been particularly difficult to get reservations, so to have the exact one we needed be free, was most surprising.

We dropped Dale off at work in the morning this time, as President Obama is in town today, and the downtown core will be pretty much closed off. We figured it would just be easier for me to scoot home after work and then pick Dale up along the way out of the city. It was actually pretty quiet in the core today, so it looks like many civil servants either took the day off or just stayed home and worked.

Nice to get out a day early, as the highway was very quiet. Driftwood is farther than we think. We generally say it is a good two hours, but in reality, by the time you get out of the city and on the road, it takes close to three hours in reality. Not many at the campground, which not surprising, but I think tomorrow night will be a different story. We are on the same site as last year, and it is a dandy. This one has more sunlight on it, which really help the solar keep the battery topped up. We are able to angle the Alto so it looks right out over the bay and down the river. Facing almost due west, nice sunsets are pretty much a guarantee. As is our routine, we shared a sandwich on the road, so we were straight into relax mode once the chairs came out.


2016 Trip 4: the Get-Away Weekend

Trip 4: Presqu'ile PP - June 2016

Thursday:
The Get-Away Weekend event has finally arrived.  What started out as an idea amongst a few of us in Ontario to camp together this summer, blossomed into a full blown rally once we posted it to the group to see if any others were interested.  We avoided using the term "rally" as the official Altoistes eastern rally is being planned for next year, and the western rally is happening this summer in Oregon.  We have not been to Presqu'ile before, and we are not really certain why that is, but perhaps it has to do with the fondness we have for Sandbanks, which is not far away.


Solar Upgrade Part 2: the install...

Lots of moving parts to this mod, and right up there on a par with the brain cramps experienced solving the furnace dilemma we had a few years back.

As I have mentioned before, do not attempt any sort of mod, or maintenance for that matter, if you are not totally confident you can do it right. The posts I have on our blog are not instructions for you to follow, just simply a recollection of stuff I have done to our Alto. When in doubt, get it done professionally. There...disclaimer over.

Where to start, although that is a bit of an odd statement given I have probably done the mod a dozen times already...in my head. One has to be extra careful with a mod that could bite you hard if it goes off the rails, and believe me, I am super dialled in when working on these ones. I figure the best way to go about it is this one is to do the outside changes first, namely the shunt installation on the battery and the new wiring, then install the Trimetric monitor and get it running, then tackle the charge controller part. This last part involves working in the close confines of the front battery compartment, which is hidden under that long front cushion, and making the switchover of the wiring and components. So this will be the order that I describe my steps.

Battery Box Work:
The Trimetric needs to monitor any voltage changes that occur across a shunt, which is a component that is installed between the negative battery terminal, and the negative load wires. When electricity flows across the shunt, minute changes in voltage are captured, and the monitor performs calculations to figure out the amperage flowing in either direction. It also monitors the voltages present between the positive and negative terminals, very accurately. The shunt is attached to the negative terminal, and this is usually done with a very short piece of really low gauge wire. In my situation, I only have the area on top of the battery to work with, so I decided to fabricate a copper connector to attach the shunt directly to the terminal. This involved bending a short piece of 1/8 inch copper bar, using my handy dandy bending brake. A couple of mounting holes later, and as you can see from the photo, it sits there quite nicely. Also visible is the new terminal fuse, a nice solution when there is limited space to work with.


The topic of fusing came up all the time, and particularly, the overall lack of it in the RV world. I decided to add fuses where research told me they generally should appear. This includes a fuse on the positive terminal. There is already a fusible link installed as part of the positive cable. This is a "slow burn" type of fuse, designed to melt away when an over amperage occurs. This is probably to help accommodate a brief high amperage situation, such as when an inverter starts up. I decided to add a high amp terminal fuse to the equation, as an extra layer of precaution. Blue Sea Marine make excellent electrical products, which I found at my local chanderly outlet. If you ever get a chance to wander the aisles of a marine outfitting store, definitely do it. There are lots of crossover products between the two industries, and I would have to say, the marine parts are of a very high quality.

Wiring:
I sourced the wire at the marine outlet. They have the Ancor brand, and it is really good stuff . Overkill, but not that much more expensive than the welding wire generally used for this purpose. These wires also needed lug ends, so I got a bunch of those as well. This raised another issue, how to crimp the ends. Fancy crimpers cost a fortune, definitely not worth the expense for a handful of necessary crimps. Again, You Tube provided a number of home grown solutions. I was soon able to crimp, and then solder my lug ends. Soldering added just that extra layer of protection from the lug coming off, but frankly, my crimps were pretty effective to begin with. Some adhesive lined heat shrink tubing completed the job. I also took the opportunity to redo the lugs on the existing wiring, as there were starting to show a little too much flex at the joint. Damn fine looking end result if you ask me.


Now to run the wires. I determined that the existing plastic wire wrap would not hold the two new wires, so I ran these in their own wrap. I was able to follow the existing wires along the frame channel, then drilled a new hole through the floor up into the electrical compartment. This wire wrap also contained the cable running from the shunt to the Trimetric, as well as the wire from the temperature sensor that sits in the battery box. Other than crawling around under the Alto, and the pain in the ass it is to remove the spare, it was a simple job.


The Monitor:
Now the cool stuff begins. The monitor is installed on the bulkhead wall beneath the front table. I fashioned a nifty little bracket, to push the bottom of it out from the wall just a bit. I figured this will make the monitor just a little easier to see and use. A few holes were drilled, and the next thing you know, we had wiring out to the monitor. I then made the connections to the shunt in the battery box, then to the monitor, put the little fuse in place...success! The Trimetric was alive.

just a few extra connections here


the little bracket actually makes quite the difference when viewing and using

The Trimetric is a nice piece of engineering, but it does have a very complicated programming side to it. In fairness, after setting up three parameters, you can be off to the races. However, people buying this particular piece of kit are more interesting in programming the hell out of it. In a world full of simple user interfaces and mouse click convenience...this thing is old school. Not only is there the challenge of understanding of what the parameters mean, inputting those parameters is a primitive process. It does though invoke a reassuring sense of function over form. While it may not be friendly to program, the sophistication of its capabilities is very apparent, and in reality, that is why it was purchased in the first place. Even the language of the instruction manuals is very functional and to the point. No tech writer has polished this text for the masses, and did require several readings just to begin to understand what was going on.

As the controller was not yet installed, I just performed the basic set up, and let it monitor away. Right off the bat I was enthralled by the information it was gathering and outputting. Enthralled might seem a bit strong...but for the longest time I was mentally kidnapped by the glow of its flickering numbers.

The Rest:
Lots of odds and sods to this part. Panel combiner, controller, fuse holder, wiring...those little changes never seemed to end. Also, I wanted to do this after dark, to minimize the output of the panels. I remember saying to Dale that I had about another hour of work to do...boy did I ever under estimate that!

First I had to take the existing controller out of the picture, and that involved disconnecting the panels, then removing the controller from the front wall, to free up that needed space. As well, I then had to remove the existing wiring that connected the controller output to the distribution panel. This is where I discovered something that seemed a little out of the norm. During my research, in all the photographs or wiring schematics I had viewed, I had never seen the controller output wires go to any location other than directly to the terminals of the battery. In the Alto, the controller output was going to the distribution panel, through a 15 amp fuse. Clearly it works electrically, but is it the most effective method...that might be debatable. To me, it's like having those precious electrons take a rather meandering route to the battery. Does it really make a difference? That depends on how you look at it.  I decided to follow what seemed to be a more common approach, and wired the solar controller output directly to the battery, through a fuse of course.

Next I needed to mount the solar combiner, the new controller, and the new fuse block. I am using a Blue Sea ATC fuse distribution block as a solar combiner. On the roof of most solar installations, the panel wires feed into a combiner box, get consolidated into positive and negative wires, then make their way to the controller, usually through a fuse. Our combiner is installed by the controller. Each panel is now fused, which provides a level of protection from each other, should one ever short circuit, and from the other direction should the controller ever go all willy nilly. I can now disconnect the panels from the solar circuit altogether, and I have lots of room to accommodate additional panels in the future. From here, the combined output goes directly to the controller, using the larger 6AWG wire.


The controller was installed and the combiner wires connected. On the output side, the negative wire goes directly to the Alto side of the shunt on the battery, so that the monitor can keep track of the solar input getting to the battery. The positive wire first passes through a MAXI fuse block on its way directly to the battery positive. The fuse block provides another layer of protection between the controller and the battery. All this is based on my view of what I think are some of the better solar installations that I have seen. I may have a bit of overkill here, but no harm done.


Final connections at the battery, and we are ready. One problem though, it is now pitch dark, and the solar is producing nothing. I left the combiner fuses out, and waited until the morning to see if the whole shebang actually works.

Next morning the fuses went in, the panels were already producing power, the controller was talking to the monitor and sweet electrons were flowing to the battery. Nice!

Now to fully program the Trimetric to manage the controller. Not to go into it completely (those really interested can download all the Trimetric documentation) but essentially you program the Trimetric monitor to manage the charging performed by the controller. Remember the concept mentioned earlier about tailoring the charging profile to the manufacturers specs, this is the time where that comes into play. Bogart has made this a little easier by creating several built in profiles that will populate the parameters needed, based on the different manufacturers specs. I found the Trojan 12 volt profile, and input it where required. This then populates the various charging voltages, amperages and timings accordingly. I discovered on the Trojan site that each of their batteries can have different charging specs, so I downloaded the spec sheet for our battery, and then fine tuned the parameters as needed. Trojan Battery has an excellent web site, and it is used as a knowledge base by many.

As the Trimetric can communicate with the controller, there is a smorgasbord of solar charging information available to monitor and review. I now know exactly what charging phase the controller is currently in, in addition to being able to know exactly the amperage output of the panels themselves. That is just the tip of the information iceberg. One of the first activities I will be doing as well is an energy audit of all things 12 volt. From this, I can then better guess at what our daily power consumption really is, and who the energy hogs are.

At the end of all of this, we now have a solar set up that monitors and charges our battery exactly to Trojan specs. Naturally there are variables, such as the hours of solar available in a particular day, but overall, I know that our new solar charging system will do a far better job of completely charging our battery than our grid power converter can. I see leaving it off grid power at home the majority of times, and letting the solar do its thing. Plugging in the night before we leave, to get the fridge cool using energy from the grid, will most likely be one of the rare times the Alto will be connected.

This mod ties in nicely with our future travel plans, where boon-docking will play be a big part. Even the past few years we have found ourselves preferring sites with no services, as generally, these are on the water, to us, a very desirable location. We have given ourselves excellent solar charging capabilities, and have ensured that any future expansion, however limited that may well be, will also be nicely accommodated.  This was a fun project, and right up my alley, because for me, the Alto is not only about camping, it is also about modding, which is definitely a big hobby of mine.

Part 3 of this saga details the energy audit for our Alto.

2016 Trip 3: a dragonfly ballet

Silver Lake - June 2016

Friday:
Heading to a new site on Silver Lake this time, a non-electrical site right on the water. From photos, it appears to be perched above the water, and has a fabulous view right down the lake. The only downside will be that it is close to Hwy 7, so we will be able to both see, and hear the traffic. It is only for the weekend, so we will gladly put up with a little extra noise to be on the water. Little traffic, perhaps because we did head out a tad earlier than usual.

Our site is awesome, situated deep up a laneway and at a higher elevation than the other sites, so we are in total seclusion...a rarity in campgrounds.  In terms of trees, it is quite open, and there is lots of sun.
nice site...feels like we are alone

It is forecasted to be a warm 80 degree weekend, so we are thinking of setting up the awning first thing in the morning to give us a little shade, and more importantly, it will help keep the inside of the camper a little cooler for our man Barley. We got the site squared away, set up our camp chairs, then settled in with a cold one, gazing over the water and seriously relaxing.

the case for a couple of sets of Lynx Levellers

Once the sun started to set we got a some shade from the trees, and the temps dropped a bit. We sat out for the longest time, as a gazillion dragonflys scooting around us and must have been decimating the mosquito population. We did not see a mosquito or get bit by one all evening. So many dragonflys to watch, they are simply amazing flyers, and with great speed and excellent darters. Mosquitos are no match for these guys. All the better. There also seems to be a variety of species, as I have seen many that do not look anything like the previous ones.

A few clouds rolled in around sunset, which is always nice for some classic sunset pics. I was hoping to get the sun peeking out from between a couple of clouds as it descended, but it was not to be. Took a few pics regardless, then we headed in. It is definitely cooling off nicely, so it will be a nice sleep.

a touch of Tom Thompson...


Saturday:
Great sleep last night, and there was only a couple of times that I seemed to have heard any of the highway noise. If you are looking for absolute quiet, this is not the site, but otherwise, I think we will book this one again. We were both up real early, but Dale did head back for another snooze. We discovered last night we forgot to pack a few things, and Dale really wanted the paper, so I made a little list and headed in to Sharbot Lake for the supplies. It is only a quick 10 minute drive and I was there when the store opened at 8:00am. It's a great little grocery store, and a few extra items made their way into the cart.

Dale was awake and waiting for her papers, quickly settling into her favourite morning routine, while I got the coffee going. We put the awning up first thing, as when the sun got over the trees it started to get warm quick. Once we got it set up, which took us at best 5 minutes, and we saw the shade it produced, we came to the realization that perhaps we should be putting it up more often. It was quite pleasant having a nice shaded area, and it helps keep the inside a touch cooler. Funny how these little ideas pop into our heads after so many years of using the Alto. Guess it just shows there is always something new to learn or figure out.

a really nice site with a great view, and up high, a nice breeze

Lounged around outside and read the paper the rest of the morning, and by noon, it was getting well into the temps where a quick dip in the lake would be fabulously refreshing. The edge has a small patch of coarse sand bottom, perfect for working your way into the lake. Dale was in first, as she always is, but I was not far behind. The water was reasonably warm and refreshing. We floated for the longest time, I swam out a distance then back, and after a while, the little chill started to set in. We can't remember the last time we were in for a full swim this early in the season. Certainly the effects of a very warm and dry spring, although, I would trade the warmth for some good long rain showers...everything is just a little too parched, this early in the summer. We sat on the rocks for a bit then headed back up for a nice chilled cider.

I suspect these boys were heading from Petawawa to Trenton...

hard to resist the Alto reflections

Still tons of dragonflies around, I can't ever remember seeing so many at one time, the constant movement was sort of mesmerizing, like watching a campfire. The afternoon was spent just sitting and staring at the lake, a perfect activity to relax with. Still pretty hot, but the passing clouds are giving us a nice break every so often.


amazing flyers, and little wonder with these dual wings

I've cycled through the information display of the new Trimetric meter numerous times. Very interesting to see exactly what the solar is doing. At 2:00pm, the sun was pretty much directly overhead, and the solar panels were outputting 8.1 amps, which is pretty close to the peak that the two of them can produce. The battery, which started the morning at 95 full, was now sitting at 102%. The Trimetric has a parameter to allow a certain percentage of overcharge to be applied to the battery, as per Trojan recommended specs. From what I seen so far, I feel quite good that the investment of time, and quite reasonable money outlay, is showing the benefits already. Later this evening I plan to do an energy audit of all 12 volt loads. Best to do this after dark, when the solar output is not an influencing factor. It was interesting to see the effect of clouds passing over the panels. The output change is picked up in real time by the monitor, and when the cloud passes, up goes the amps out. Pretty geeky stuff, but definitely most interesting.

We brought Barley out to sit with us in the afternoon, as there was a little breeze and it was a bit cooler. He was restless at first, but did eventually sit in the step outside the camper, close to the door, in case it magically opened and he could slip in unnoticed. Good luck with that.
The awning has been a godsend this weekend, as the sun has been quite intense. It offers a nice little respite area from the rays. A cold cider and a grapefruit Radler beer helped quench the afternoon thirst.


Pre-dinner G&T time rolled along, so Dale made us up a couple while I started to get the dinner ready. The sun is starting to get lower in the western sky, and our awning shade areas are now moving in the opposite direction.
Simple burgers on the Q this evening, with a potato salad side I picked up this morning in Sharbot Lake. Washed down with a cold beer, kept cold much longer in our new Hydra Flask pints, made for a nice camping meal. We sat out and watched the sun go down, a nice ending to a relaxing day. It has cooled off this evening, and the camper is now at a great temperature for a good sleep.

the new insulated flask works great...definitely makes a difference in how long the beer stays cold


Sunday:
Woke up early to a bank of low grey rainclouds marching their way towards us. No complaints here though, we badly need a real good soak of rain lasting a few days.
amazing the sights at 5:00 am

Started to drizzle so started up packing up the outside.  Back inside, we turned on the furnace to take the chill off, and crawled back under the covers for a few more zzzz's.

By the time we awoke again, the rain was really coming down. The parched ground was quickly soaking it up. We are in no hurry today so we put on the coffee, lounged on the bed and read the paper.


Barley enjoys Sunday morning papers as well

It rained for a couple of hours, then tapered off into scattered showers. The dark clouds finally passed, it got much brighter out, and the rain stopped. Slowly started to get our act together to head out, and the weather cooperated by actually clearing up a bit.

Uneventful drive home and it was nice to see that the rain seemed to perk up the farmers fields along the way. Our lawn and garden beds seemed more alive as well, and we took the opportunity to do a little (long overdue) weeding. All in all, a great weekend. We found a new site to book again, and even though there was some highway noise, the view, being on the water, and the nice breeze more than made up for any traffic. We will be back to this site in the future for sure!

Solar Upgrade Part 1: solar musings...

This is a long post...two parts actually. It is pretty much my thoughts based on a winter of analysis, trying to figure out how to best manage our future solar requirements. Do any sort of reading on solar power for RV use and for as many manufacturer articles and personal blogs you find, you will find a similar number of opinions. You really have to separate the wheat from the chaff to get at what is best for you.

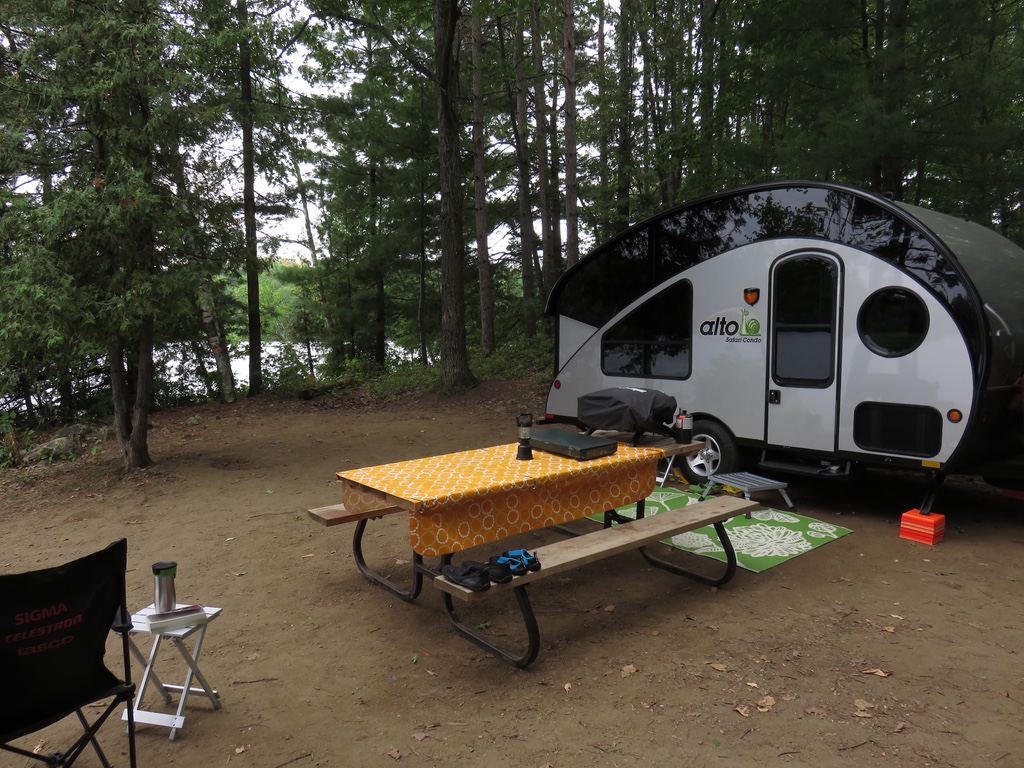
As retirement is just starting to peek over the horizon for Dale and I, we find ourselves thinking more and more about how we will spend our time. A lot of that thinking is centred around how our Alto will figure into these plans. I have to admit, the places to visit and sights to see are mostly coming from Dale's planning. A good part of my planning, quite naturally so, is centred around how to make sure the Alto best meets our travel and campsite needs. We knew pretty quickly that the Alto would be well suited for us, from a design, usability and comfort perspective. Safari Condo has put a lot of thought and effort into making this a great product right out of the gate...and it certainly is! Over time and use though, we have been doing a few things to make it just a little bit better for us. I think most owners do this. Nothing big really, just stuff that we want to add, mods we make, that sort of thing. So we have been reading and following a number bloggers, ones that seem to either resonate with us from a travel perspective, or those that perk my interest from a technical bent, all towards gathering information for the future.

I've been reading a lot about solar power. A LOT.  Focussed primarily on RV applications, but also general knowledge. Scratch the surface on this topic, and you will find there is much more than just panels and batteries. There is the theory, the various types of components, and of course, the abundant opinions. So as I kept discovering new sources of information of the topic, I found myself gravitating to those that just seemed to make the most common sense to me. The key is finding that balance. There are lots of solutions out there that are just so enticing...the lure of the lithium battery, the wattage available with newer/more panels. All this dreaming comes at a cost though, both in terms of monetary and effort outlays. It is very easy to be led down the garden path towards someones idea of boon-docking nirvana. Sanity must prevail. Personal needs must be determined, and those are different for everyone. Spend too little time figuring this out, and you may find your wallet a lot thinner than it really needs to be.

I sifted the info, contemplated the sort of camping we would be doing, and tried to come up with an overall solar plan to best meet our needs. At this point, we don't anticipate the use of an inverter, so that will certainly factor into our required capacity. There are those that certainly do need to use an inverter, but I am confident our solar planning will support this in the future, should the need ever arise. So just where have I ended up after this information overload. I like to think I have figured out our anticipated needs as best I can, bounced my ideas off poor Dale, who in fairness, has tried her very best to not fall quickly asleep listening to my technical ramblings. I can get pretty focussed when I become interested in a topic, especially one that can easily morph into a hands-on project. As well, based on our off-grid experiences of the past few years, it seems we don't really need to throw a lot of money at this to see an improvement. Going the lithium route to gain amp hour capacity, now that would be some serious coin, and probably not really necessary for us. I think this is one of the key decisions for those contemplating the same sort of analysis. Lithiums do take you do a bit of a different path from an equipment perspective, and it requires some serious thought, and a fat wallet.

What will our setup look like? Well, no acres of panels, no expensive lithiums, no inverter sucking the life out of our battery, and certainly no configuration to support air conditioning. Don't be thinking for a moment though that if it got stinking hot while we were in the middle of nowhere, that we would not be pulling up stakes and heading towards the nearest full service park...to plug in and crank that A/C up full.

Another big influence over the solar improvements available to us were the limitations imposed by the Alto itself. We don't have a lot of space to work with. We are somewhat panel limited by a small and unique roofline, and we are battery limited by a tiny and already well utilized tongue area. There are the possibilities of external panels, or lithiums inside, but both of those would impact our storage space, in the tow vehicle and the Alto. There is no way there will ever be a line of Trojan T-125's residing on the tongue, as excellent as that would be, but it is just not feasible. I have recently heard of one Alto owner almost covering the roof with panels, and it looks pretty impressive, but just what are they charging with those watts of power? Perhaps a big bank of lithiums, but that brings us full circle back to that space concern. Who knows what the future might hold. If our panels have an issue down the road, we would probably take the opportunity to add an extra panel, and maybe throw on an extra battery...but right now...that's not in the cards.

So what are the core concepts of our plan? Well, kinda straight forward really:
- the panels we have
- a good monitor & charge controller
- improved wiring
- true deep cycle battery
- energy efficiencies

Let's bounce around some thoughts on these:

Panels:
There are a number of general ideas floating around out there that try to provide a guide as to how to size your solar array, and what is needed to recharge a battery bank. Figuring out what, or who to believe definitely takes some thought. I went with the guides that seemed to be logically defined and explained, and ultimately, just simply made sense to me. It is said to have a panel array output wattage relatively equal to the 20 amp hour rating of your battery bank. Seems reasonable. As well, given an average of the effective solar generating hours in a day, and this will certainly vary a lot, you should have at minimum from 3-6 % of your total battery amp hour rating available in charging amps, to even hope to recharge your battery bank.  This is perhaps a a little tougher to quantify, but these same numbers came up a lot. I'll go with this.

We have two 68 watt panels on our Alto, wired in parallel, for a combined output of 136W / 16.5V / 8.2A. These are the specs based on testing at what is referred to as STC (Standard Test Conditions), and really only represents perfect world lab conditions. Looking at the other set of specs, based on NOCT (Nominal Operating Cell Temperature) and the numbers are certainly different at 106W / 15.4V / 6.84A. This second test is meant to mimic actual conditions, so perhaps reality is somewhere in between. Either way, real output is less than the glossy brochure says. Crunching some numbers made me realize that even though we have a relatively modest panel watts/amps, we should be OK from a charging perspective. One also has to keep in mind that you are really only recharging half your total amp hour capacity, given that you should not run down your battery to below 50%. So what would I do with a roof covered in panels, I'm not really sure. Certainly would speed up the charging times, but I suspect we will be just fine as is.

Monitoring:
To really know what is going on with your batteries, you need much more than those idiot lights or a simple voltmeter. You need accurate voltage readings, and a way to keep track of the amps/watts being consumed and then replenished back into the battery. To get this, you need a good monitor, and also a shunt. These two work hand in hand to provide information back to the user. General consensus out there seems to be that the Trimetric brand, made by Bogart Engineering, is one of the very best of monitors available. It can provide all sorts of key information back to the user, and this information can be adjusted based on the geekiness of the particular user. Ours will be set up for maximum geek.

Charging:
Now here is a very interesting aspect of the whole solar equation. Opinions run pretty fast and furious here, not only from the user community, but also from solar equipment manufacturers and retailers. Lots of statements get bounced around..."Get an MPPT controller because it boosts the output of your solar panels". Do you know why, do you have the whole story, does it apply to your solar setup? And the list goes on. This is when you need to continue to read, develop your own opinion, and apply it to your needs. In a nutshell, it seemed to boil down to a couple of things. The type of controller to use...PMW or MPPT, which one could argue is really decided for you based on the output specs of your panels, and whether you feel the controller will be charging your battery effectively?

From what I have seen and read, solar controller manufacturers do not seem to be optimizing the phase charging voltages according to battery manufacturers specs. This does impact the efficiency of a controller to truly bring the battery to a full charge. In most cases, it is very much a one size fits all situation. Does generic get the job done...perhaps. Do the majority of end users really care...probably not. Regardless of the PMW/MPPT debate, it seems to me that a key requirement for a controller is to provide the ability for user adjustments to the phase voltages, to bring this in line with what a battery manufacturer recommends. After all, who best to spec those details. Exactly! And by the way...phase voltages are just one part of the equation, there are a few others that matter as well, such as current output and charge times, but volts always turns up as the first discussion point. To top it all off, controller manufacturers are not the only ones lacking this flexibility. When you plug into grid power, that converter is likely not optimized to charge effectively either...and some don't even provide phased charging. It's kinda like never totally filling the gas tank on your car before a big trip...why would you not do that? To me, good controllers are adjustable, and sophisticated enough to utilize charging parameters to best ensure the battery is operating at full capacity. If I'm limited by the amp hours that I can carry with me, and we are, then I want to make damn sure I have as many of those available for use as possible. What controller to get...one that I can adjust to suit the battery I am using, even if I change it out down the road.

Wiring:
Small gauge wires can impact your charging efficiency. Simply Ohm's Law. The more resistance in the wire, the less voltage/amps getting to the battery. Smaller wire equates to greater resistance...and this is definitely a direct current specific statement. General rule of thumb is to have as big a wire as possible between the output of the controller and the battery terminals. In a perfect world this would apply to the entire solar circuit, but in reality, that is sometimes hard to achieve. Pretty hard to run a 4 or 6 AWG wire up to the panels on the top of the Alto...now that would be an interesting challenge. So in that case, maximize the wire where you can. There are wire gauge tables out there that will tell you the recommended length for each gauge of wire, to keep any voltage loss below a 3 percent maximum. Does any of this really matter.  Yes...and no. If you have gobs of panel wattage and battery amp hours, probably not. But if you are trying to eek out as much power as you can from a modest solar setup, then I am of the opinion it certainly can't hurt.

Battery:
Another very opinionated topic. Flooded, AGM, Lithium...how to decide??? Easy..research and buy to suit your needs, and wallet. Of late, I have been fascinated with the promise of the lithium battery. They sound like an ideal overall solution. Awesome usable amp hour capacity, compact, relatively lightweight, simple charging profiles...this all sounds ideal. What do these wonders cost? "Really...wow!".  As with most new innovations, the early days are the most expensive. Crazy expensive. Now before you bring out your calculator and start rhyming off cost per amp/hour numbers, the bottom line is that right now, to me, they represent a tremendous outlay. And it is not only for the batteries themselves, the charging and battery management components that are required go for a princely sum as well. Now if we were going to be full timing, then the benefits might well outweigh the sticker shock. I gather the lithiums are a bit temperamental as well, and do not peak performers in hot temperatures. That is why you will rarely find them installed in battery boxes on the tongue of a camper. This means they would be inside the Alto, and that means giving up storage space.

We needed to replace our original battery last year, which was a Marine/Deep Cycle group 27 unit. I did a little research and went with a Trojan 12v deep cycle battery, in a group 31. This has increased our amp hour availability somewhat, and it is what I am calling a true deep cycle style of battery, where the design considerations are more based on charge/discharge cycles and amp hour capacity, rather than the need to crank over an engine. I had contemplated going the dual 6 volt battery route, but decided to wait and see how this new one would perform.  We also want to get a year or so of retirement trips with extended boon-docking under our belts first, to really give us an idea of our true needs.

Energy Efficiency:
How conservative you are with the amp hours available to you will directly impact your boon-docking time. Run an inverter to make popcorn in your microwave, or watch movies all weekend (we've been there, suffered the consequences) and you will find yourself with a dead battery. It is no fun when your propane fridge shuts itself off because it has no power to meet the 12v requirements...and that is a pretty minimal draw. We won't even get into a debate on the merits of the 12 volt compressor fridge over a propane...that's another hot topic. For the record though, I'm in the propane fridge camp, and actually, quite happy to debate that.

You can do all sorts of things to conserve power, and it certainly does not mean you have to sit there in the dark like a couple of moles. Switch to LED lighting, if you do not already have them. We did, and beyond the energy efficiency, we really like the warmer colour tone of the light they provide. Become aware of your power usage, figure out your power priorities. First thing that jumps to my mind as a priority is the fridge. I'll take a cold beer over a bag of microwave popcorn any day of the week! I guess you could say it all boils down to living within your amp hour means, and a factor in that is definitely how well you can recharge that battery. We find that after draining our battery a couple of years ago, we have become very power conscious when off grid.  We have boon-docked for a couple of weeks solid, and so far, have not had any real power concerns, and we are hoping this little upgrade will help our overall solar system.

So after this rather lengthly rambling, where does that leave us. With this:
-Trimetric setup
-Improved wiring (and fusing!)
-True deep cell battery (already in place)

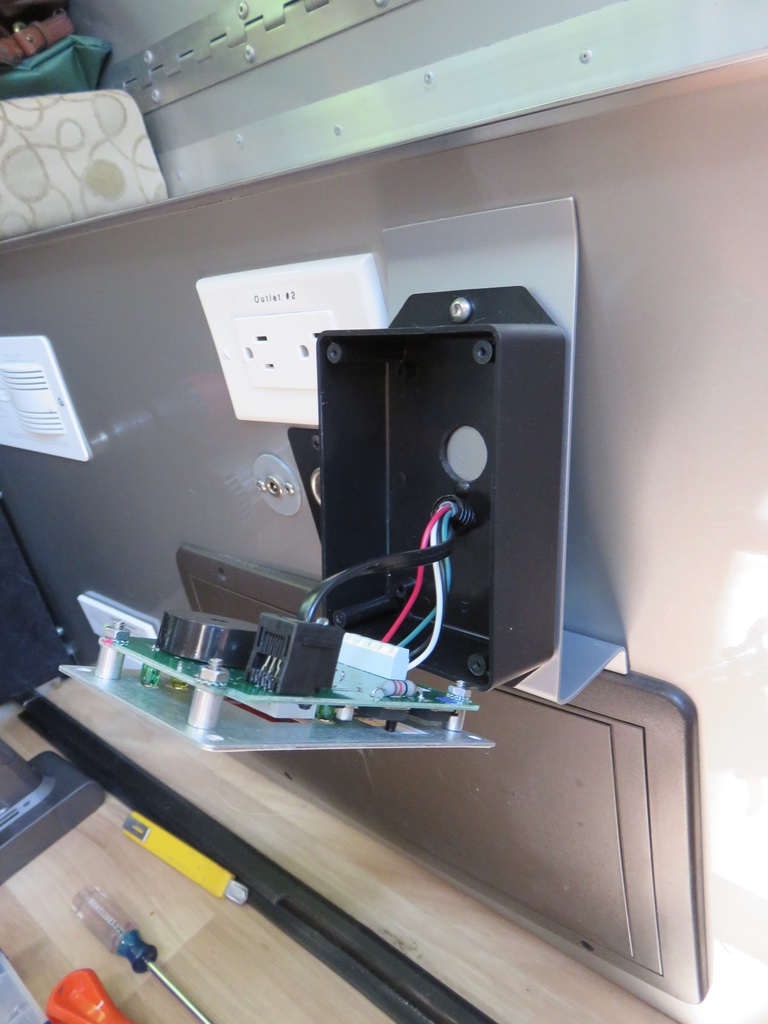
The general idea is to swap out the existing charge controller for a Trimetric SC-2030, and manage it with a TM-2030 monitor. These pieces were designed to be used together. New wiring from the controller directly to the battery will be 6AWG in size, and fusing will be added in appropriate areas of the solar circuit. All this in the hopes to maximize the charging and storage abilities of our rather modest solar setup.  Even in the future, I can't see changes going much beyond this new setup. Perhaps an extra panel, perhaps another battery, but that is about it. I might also say that this could be termed a reasonable upgrade, specifically in terms of a monetary outlay.

Part 2 of this will detail the work involved to put all the pieces in place, and it was a fair bit of work.

Another Bearing Repack

Once again it is time to pull apart the hubs and clean and repack the bearings. At the same time, I give the brakes a good cleaning. It's a pretty straight forward job, but it does take a bit of time, as you have to jack up the Alto, pull everything apart, clean and repack, then put it all together again. I imagine at some point I will just have it done somewhere, but until that time comes, it will be one of those spring jobs I do.

I noticed there was a fair amoint of brake dust on the inside of the rims, so I suspect I have been re-adjusting the shoes perhaps a tad to close. This time I will make a point of leaving them backed off just a little bit more. I can always give them a fine tune if I find the electric brakes are not grabbing enough. Once I got the hubs off, everything looked pretty good. The grease is still bright blue, with no sign of discolouring of that icky milky consistancy when water has started to get mixed in.

Gave the drums and the shoes a good cleaning, then pulled the back seal, cleaned both the bearings, had a real close look for any pitting or excessive heat scorching, but all looked good. Repacked the bearings, greased up the races, then put the hubs back on. Tightened up as per the Dexter Service Manual, and we were done. Checked the brake adjustment, then headed over and did the other side.


front bearing ready to go...

a lot cleaner now...and still in real good shape

I'm rotating the tires, so the service side tire now becomes the spare. The inside of the rims were in bad need of cleaning to get rid of the brake dust, but afterwards, they looked great. Getting the spare tire back in place was probably the part of the process thst I was least looking forward to. The way it hangs under the tongue is a very nifty setup, but a serious pain in the ass to re-install. There had to be a simpler way to do this other than brute effort. After staring at it a bit, which is an activity that has always served me well in the past, I figured that whatever method used to help the process had to utilize gear that would be with us at all times.

Looking in the trunk, I spied the Anderson Levellor, and the wheel chocks. I figured if I could get one side propped up high enough, it would be easy to just raise the other side and start threading on the support bar. Sure enough, I was able to use the levellor and chock to get the one side almost totally in place, then I easily lifted the other side up, held it in place with my knee, then secured the whole thing. Easy peasy.

works like a charm

I think we could probably go three years between repacks, based a lot on the current yearly milage we do. Will we go the three years, hard to say. It is nice to know that the bearings are in good shape.